This new method to upscale images using controlnet and the stable diffusion extension or script. I have tried this method several times to make sure that this method is stable and can produce consistent result.
So lets get started.
Table of Contents
Downloading Ultimate SD upscale extension
- Copy this link
https://github.com/Coyote-A/ultimate-upscale-for-automatic1111.git - Go to extensions tab and paste this link in the URL for extension’s git repository
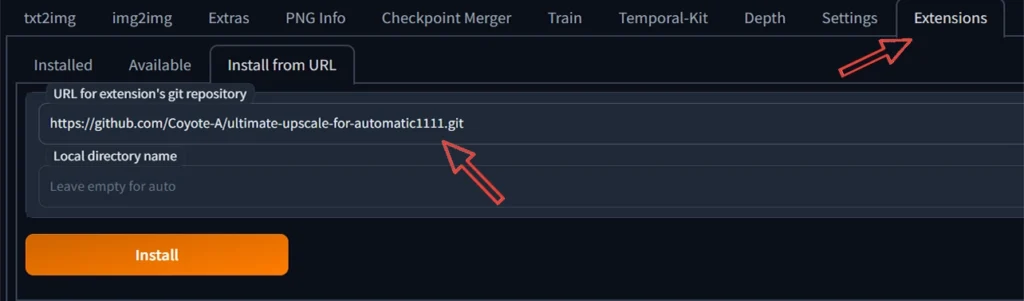
3. Once installed go to Installed tab and Click on Apply and restart button.

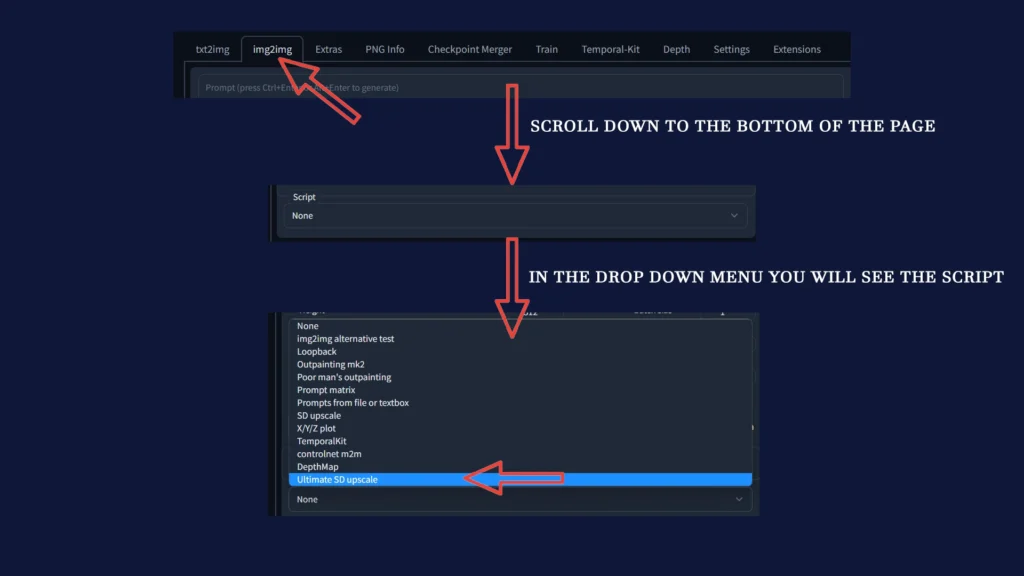
4. You will be able to see the Ultimate SD upscale script in the img to img tab.
Which controlnet to use for upscaling?
If you don’t know how to install controlnet go to this article here and then come back here. Once you have installed controlnet you will have to use controlnet tile resampler model.

As you can see in the image above there are two files with same name control_v11fle_sd15tile. Download both these files and put in the stable-diffusion-webui\extensions\sd-webui-controlnet\models. Once you have done this we can move on to our main topic i.e upscale images.

Steps to upscale images on stable diffusion using controlnet and ultimate sd upscale script
Step 1
Generate a text to image or you can use previously generated image. For this article purpose i generated the image using this stable diffusion prompt “a painting of a wizard, surrounded by fire, a detailed illustration, fantasy art, decent lighting, white shirt and blue wizard clothes, realistic cartoon, magical look, medibang, videogame asset, computer painting, fantasy art, royal, 3 d render”. I used simply beautiful model and the i got this result :

Step 2
Then I exported the image to img-to-img tab for inpainting. I painted over the face to improve the eyes, as you can see the eyes are close and face doesn’t have much detail either. I have also given the settings of inpainting in the screenshot below
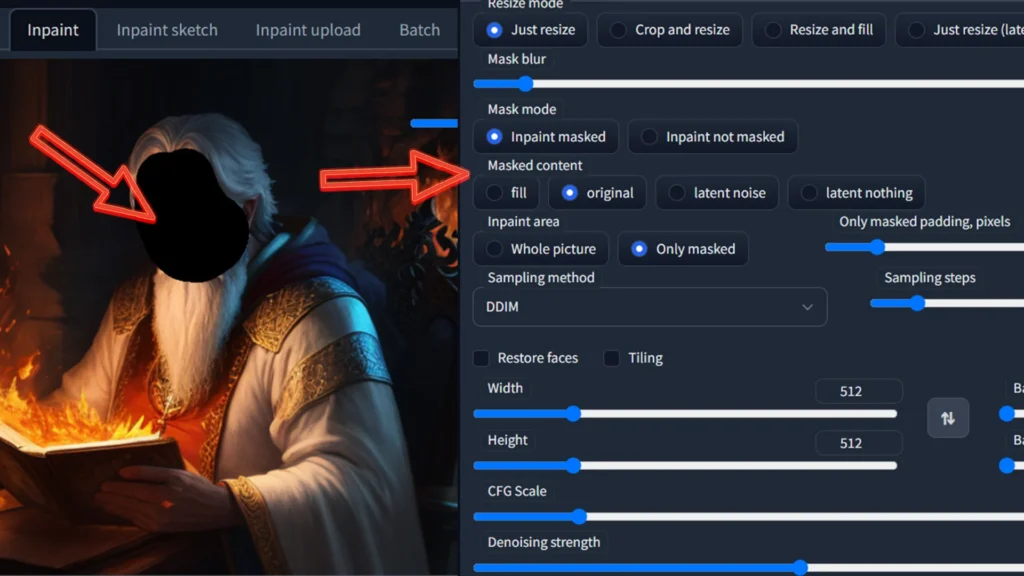
Result was this :

Step 3 – Important part
You can skip first two steps if you already have good enough image that you want to upscale. Now the image from second step should be exported to img-to-img tab.
Now go scroll down to controlnet tab and select controlnet tile as preprocessor and controlnet tile model.

The image you have exported in your img-to-img tab will automatically be used as reference image in controlnet.
Go to scripts and select ultimate SD upscale and do these settings
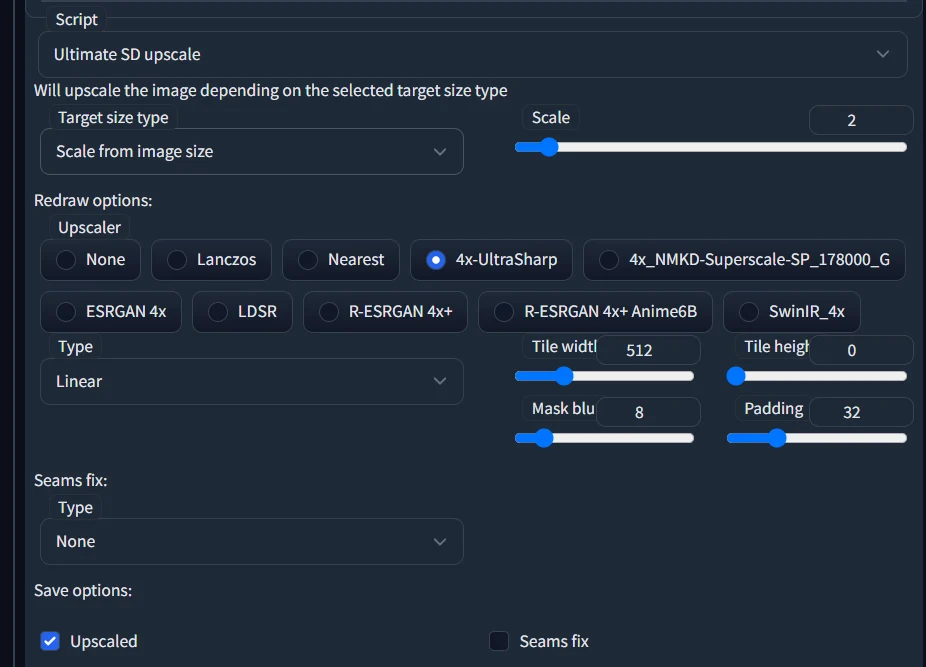
You can scale to any size you want but i would suggest you keep the scale at 2 and keep upscaling the results again and again to make it bigger. Choose the upscaler model of your choice. I have described the difference between few upscalers in this article upscale images on stable diffusion.
Now time for end result

As you can see the face has great details, even the details on clothes has increased, you can upscale this image further to 2x and so on.
Video Tutorial for the same
Conclusion
There is no correct or wrong way to upscale. I just showed you my second method on how to upscale using controlnet tile and ultimate sd upscale method. The advantage of this method is that you can upscale images even upto 16k using this method even on a system with 4GB VRAM.
Disadvantage of this method is that this method takes time to generate 16k image. For example it makes 4 tiles of 512×512 to upscale an image to 1024 and this time would double as the resolution increases.