Are you upscaling your images correctly? I don’t think so. After reading this article you will know how to upscale images on stable diffusion in a correct and better way. Well here is a better way to upscale images on stable diffusion If you are using stable diffusion automatic1111 webUI then you must know how to upscale correctly, and this trick is just insane on how clear the results are.
First of all click on this link download this file for upscaling as shown in the screenshot below. This ai image upscaler is one of the best to upscale images.
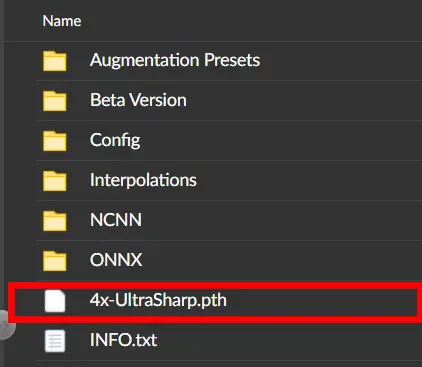
Now in put it in the esrgan folder. The path should look something like this based on your location. “C:\Users\Your_user_name\stable-diffusion-webui\models\ESRGAN” and now you are ready to use the ai image enlarger.
Most people upscale it like this way – Making a 512×512 image and then directly upscaling it in the extra tab of automatic1111 webUI which completely wrong because it causes JPEG artefacts to appear in the image and they look so bad making it unshareable on any kind of social media. Well here are some better ways to upscale images on stable diffusion.
Table of Contents
1. Upscale images using Highres Fix on Stable diffusion
This is the one of the revolutionary thing in Automatic1111 and people are unaware of how powerful highres fix tool on stable diffusion is.
What is Highres fix on stable diffusion?
In layman term highres fix is typically an img-to-img built into text-to-img tab. Suppose you generate an image like say 512×512 and then you export the image to img-to-img to make some changes, its the same with highres fix. You just use the slider to enter the amount of resolution you want for your image.
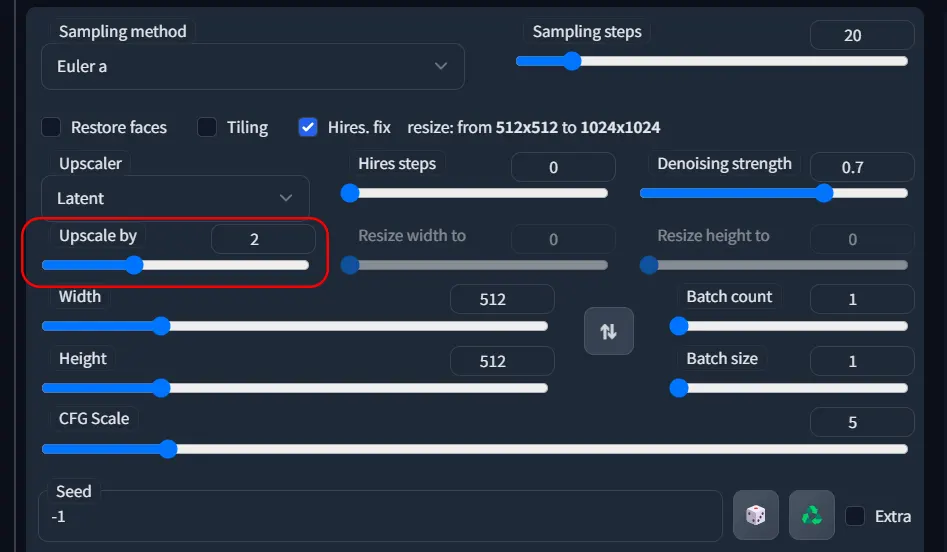
Method 1. – How to use Highres fix or High resolution fix on stable diffusion
Using Highres to upscale images on stable diffusion automatic1111 webui is one of the best method to get a great details on your generated Images. Upscaling images with the help of highres fix helps you get rid of the jpeg artefacts sometimes you get in your image. Here is how to upscale your images using highres fix:
- Step 1 – Turn on the highres fix by checking the highres fix
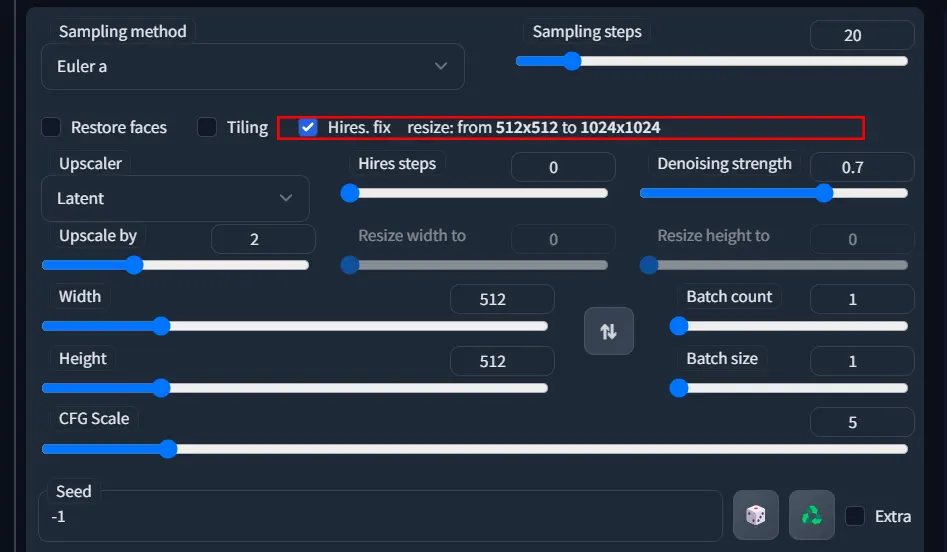
- Step 2 – Adjust your slider according to your GPU. For low end GPUs like 16xx or 10xx with 4GB VRAM I would recommend 1.5x and for 6GB VRAM GPUs they can do 2x and also it depends on your level of patience as well as low end gpus might take time.
- If you have set your generation to be generated after 20 steps then it will go through those 20 steps twice because you’re applying highres fix.
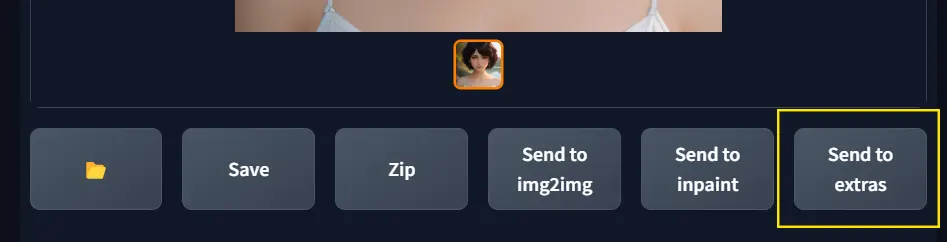
- Send the generated image to extras or you can upload the image directly from your folder if you want to upscale previously generated image
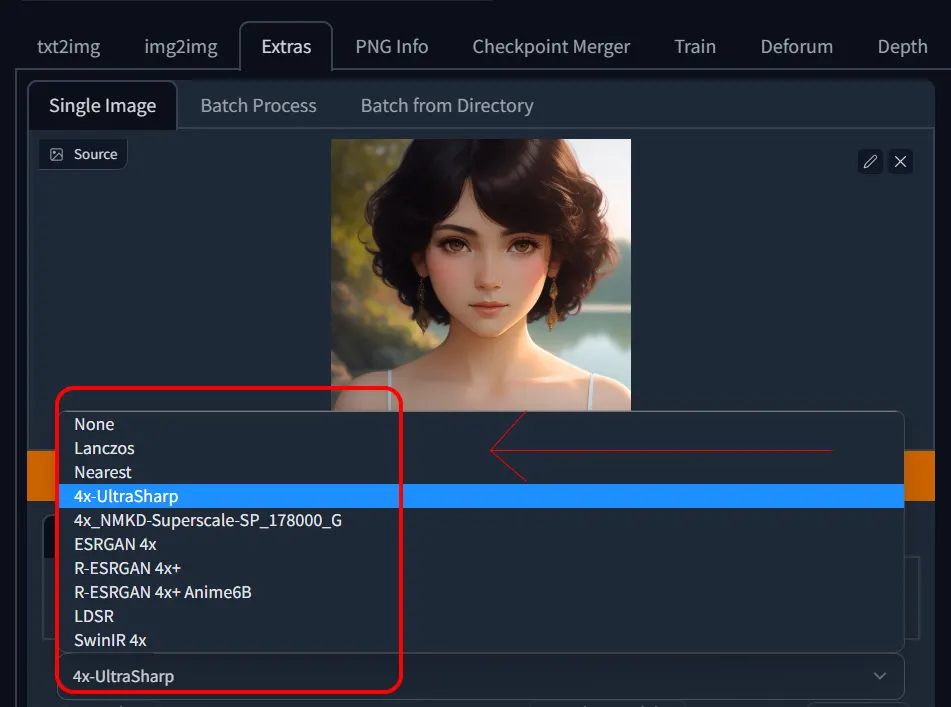
- Now select the 4x ultrasharp upscaler or NKMD superscale, or any upscaler of your choice but I would recommend 4x ultrasharp.
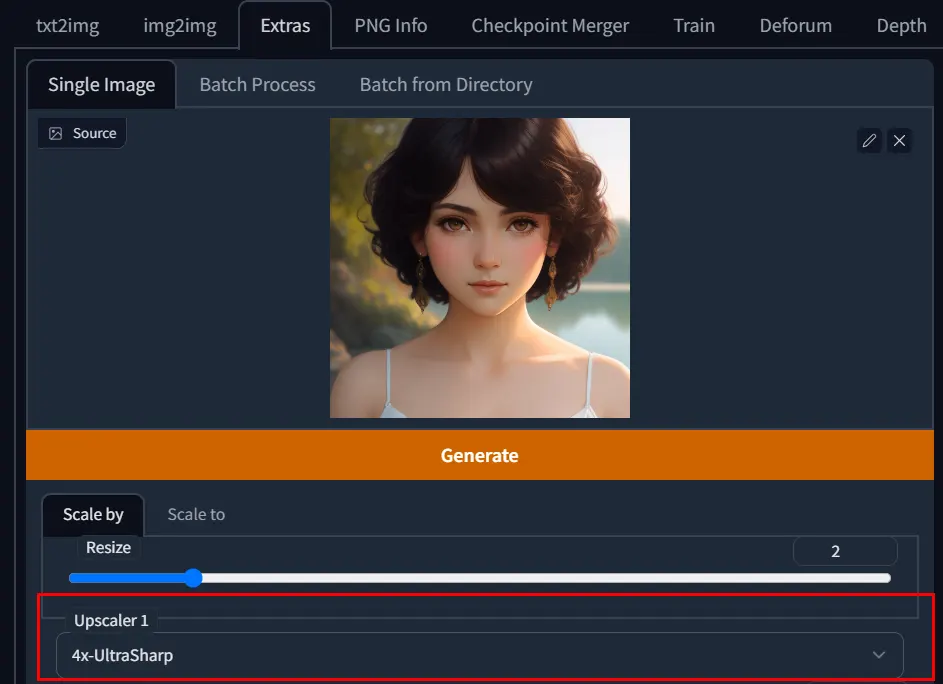
- Voila you have a highly detailed image now.

This is how you upscale images using highres fix on stable diffusion, however there is one more way and i prefer the second way to use ai image upscaler to the best of its abilities.
Method 2. -Use Img-to-Img to upscale images on stable diffusion
This method is one of the best method to upscale images on stable diffusion as this method adds details to the image and corrects a few abnormalities along the way. Here is the explanation for using img to img to upscale images on stable diffusion.
- Generate an image but this time don’t use highres, just generate simple 512×512 image
- Export it to img to img tab on automatic1111 webUI
- Now take the slider all the way up to 1024×1024, that is 2x of the generated image.
- Keep the denoising strength slider between 0.2 to 0.3.
- Generate the image. This will generate a 1024×1024 image
- Now export it to the extra tab on automatic1111 webUI
- Keep slider to 2x and use 4x ultrasharp upscaler or NKMD superscale
- Voila you have upscaled an image with greater quality.
Always remember that never upscale image with 4x strength that will generate jpeg artefacts in your video which makes your image look bad.
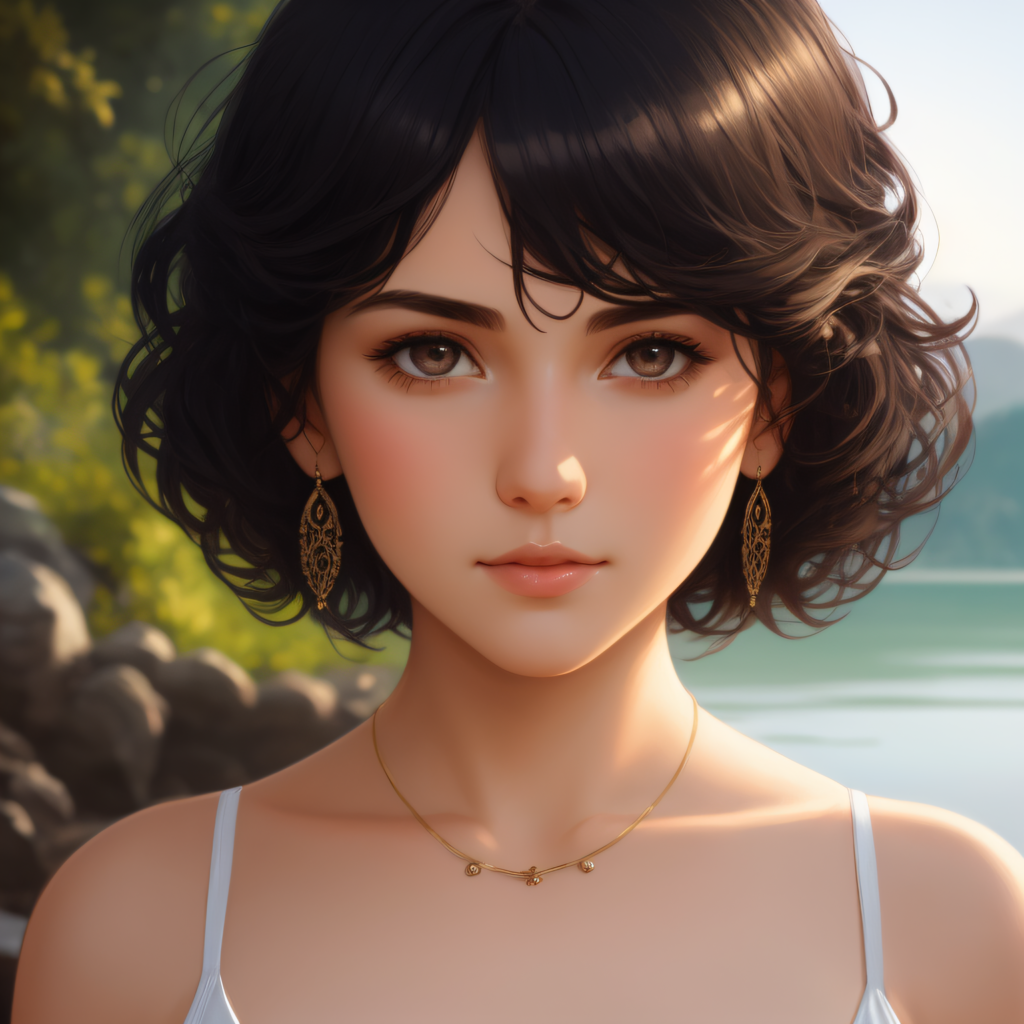
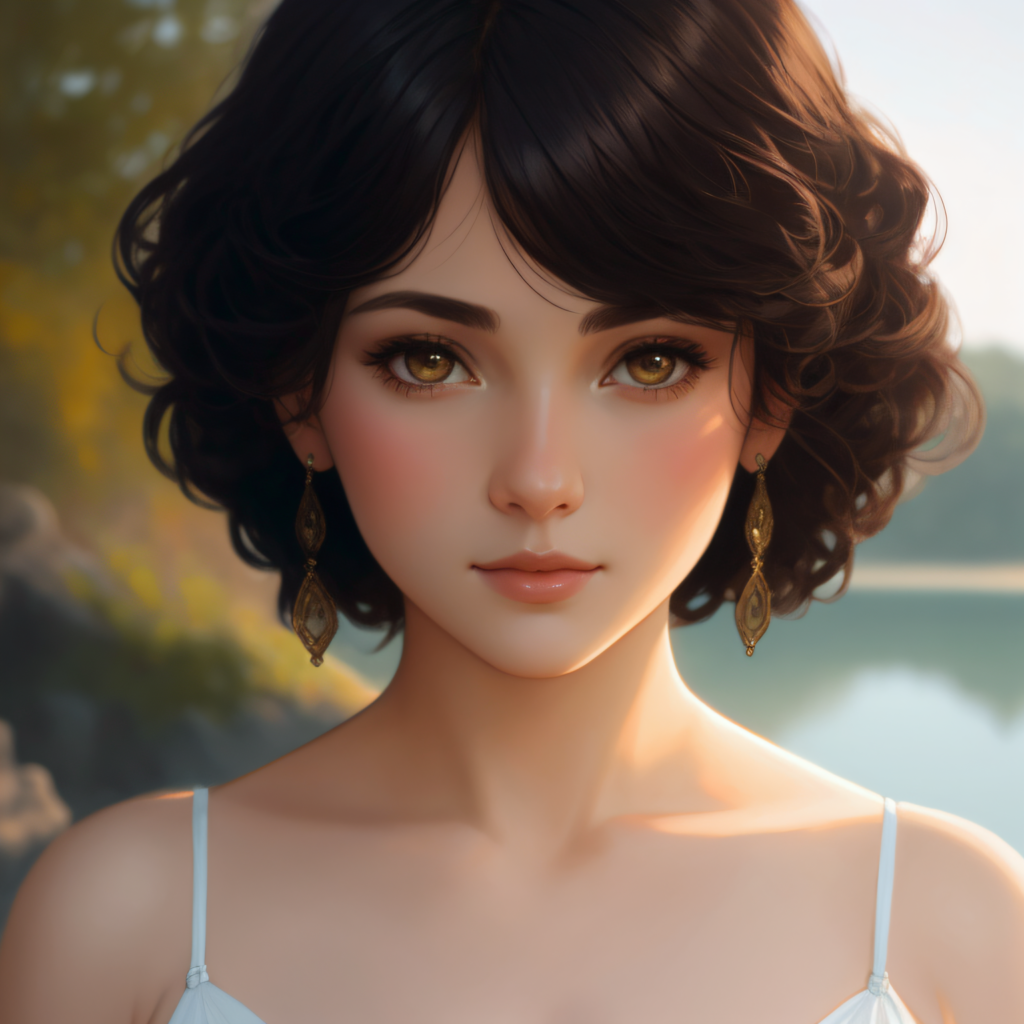
Comparison of every upscaler after using img-to-img upscale
NKMD Superscale

ESRGAN 4x result

4x Ultrasharp upscaler after img-to-img upscale
How to upscale in stable diffusion online
If your pc doesn’t have the capacity to run automatic1111 webUI then you can use apps like Remini to enlarge your images.
- You can visit this link on hugging face to upscale images.
- There is another called replicate platform where you can use ai image enlarger.
These are few ai image enlargers online which you can use to upscale images. Good luck 🙂
Conclusion
As you noticed there is a slight difference between these upscaler, one might work in different situations and one in other, there is no right upscaler just depends on the preference and kind of images you are making.
- NKMD tends to desaturates the color, very slightly but the difference is noticeable to my eyes, but it works better with face restore in my testing
- Esrgan 4x is kind of the mainstream upscaler everyone uses it, it isn’t bad, its good for anime stuff.
- stable diffusion-x4-upscaler tends to add more details to the eyes, skin and hair. I prefer this for my photorealistic images. So, it comes down to personal preference which upscaler are you going to use.
- In case you’re wondering I am using dreamshaper version 4 model to demonstrate the images in this article.
If you need visual representation of the same, here is the link to this awesome video by Olivio Sarikas