ControlNet has been making noises since its launch, and rightly so. This is one of the best add ons that you can use with Stable diffusion to guide your image generation to certain poses and colors. There are various models of Control Net.
Controlnet just got better with controlnet 1.1 click here to jump directly to know more. However if you haven’t installed controlnet then you may want to slow down and read the whole article carefully
But how to use control net with stable diffusion or how to install controlnet and what are the best models for controlnet that you can use to improve your results with stable diffusion. All your answers in this article.
Table of Contents
What is controlnet?
ControlNet is like a magic tool that can change pictures as you like. You know how sometimes you take a picture, but it’s not perfect? Maybe you want to change the way people are standing or the way things are arranged in the picture. It’s like you can pick and choose which parts of the picture you want to keep and which parts you want to change. So if you took a photo of your friend and want to change the pose of your friend in a funny pose, Using Control Net with stable diffusion can help you do that.
With controlnet you get the ability to control human poses, changing the sky in the background while keeping the foreground, changing the environment, if you make doodles, just click a photo of it and see it change into something amazing using controlnet with stable diffusion, the possibilities are endless. Here are some examples:


How to install controlnet on automatic1111 to use with Stable Diffusion
Here is a step by step procedure to install controlnet easily to use in your automatic1111 web user interface. If you don’t have automatic1111 interface then you should go visit this link to know how to install Stable diffusion on your system be it PC or laptop and then come back to this article here.
Step 1 – Go to extension tab of your Automatic1111 WebUI interface. Under the extension tab click on install from URL tab and copy this url https://github.com/Mikubill/sd-webui-controlnet.git and paste it in the tab like I have shown in the screenshot below and click the Install button in the orange color.

Step 2 – Once the installation is done, Click on the Apply and restart UI button. That’s it. Congratulations, you have installed control-net on your system.

You will see controlnet in your txt2img and img2img tabs as shown below in the screenshot.

Now that you have installed controlnet successfully lets move on to the section where I am going to explain how to use controlnet with stable diffusion effectively to get your AI art generation to the next level.
Step by Step guide to use controlnet with Stable diffusion to get great results
Controlnet Models
Next step is to download controlnet models. If you are new to controlnet just download the three models I am suggesting you, canny, openpose and depth. These are the ones that will get you the results more often than not.
Smaller sized model link for controlnet, download the 700mb models, if you have low VRAM (less than 8GB VRAM) issue you can download even smaller sized models starting with t2iadapter models, these t21adapter models will generate the images without slowing down the image generation. Results might be slightly different.

Here are a couple of examples of 700mb controlnet model vs t2iadapter model


As you can clear see from the above image you should download controlnet 700mb models as t2iadapter is more of a style transfer than copying the exact pose hence it was not able to capture the hand poses at all, while controlnet canny model did it with perfection. Once you have downloaded the models put it in the models directory of stable diffusion. The path might look something like this C:\Users\Your username\stable-diffusion-webui\extensions\sd-webui-controlnet\models
How to use controlnet with Stable diffusion?
Controlnet copies the style of the reference image and then it guides your art generation accordingly. Suppose you saw something on the internet and want something similar to that but with few changes, what you need to do is copy that images and upload it to the controlnet interface. Here’s what the interface looks like once you expand it :


I have outlined the most important things to remember for beginners. In the red rectangle I have outlined the most important stuff that shouldn’t be ignored. You should always check enable button, Low VRAM checkbox is for those who have less than 8gb of VRAM, ignore it if you have 8GB VRAM. Invert Input Color option is for when your background is white in the reference image you should check this box else ignore. You can play with other option but this is the most basic setting.
Now in the second purple rectangle, you will see preprocessor and model. The models you have downloaded will show here, and you should choose same preprocessor and model. Below the purple rectangle you will see another important things that are useful before pressing the generate button.
What is weight in controlnet?
What is the use of weight in controlnet? you may ask. Well weight value will define how close you want the generated image to be close to the generated image. More weight means less creativity and more precision while weight less than 0.5 offers the AI to give your image some creativity. I prefer to keep it around 0.3 when I have no idea how image would look and if i want the precision i keep it between 0.7 to 0.9. Play with the weight while using controlnet and find what you prefer.


What is Guidance Scale in controlnet?
Guidance scale in machine learning and artificial intelligence is like giving a computer a lot of examples to learn from. It’s like when you learn something new, you need to practice a lot and try it many times to get better at it. Similarly, the computer needs to practice by looking at many different examples and learning from them. This helps the computer become smarter and better at solving problems!
You will see two different scales one is Guidance Start and second one is guidance end. In machine learning, if you increase the Guidance Start scale the AI model will start learning from the middle you need to give it time learn, so set the guidance start scale to zero as it should be. Here are few examples of how guidance start and end affects an image:

Guidance End – 1

Guidance End – 0

Guidance End – 1
Model used for generating above images is canny model. I have used same reference image as I have been using in the article.
Photo by Aidil Bahaman from Pexels
More examples of what Controlnet is capable of
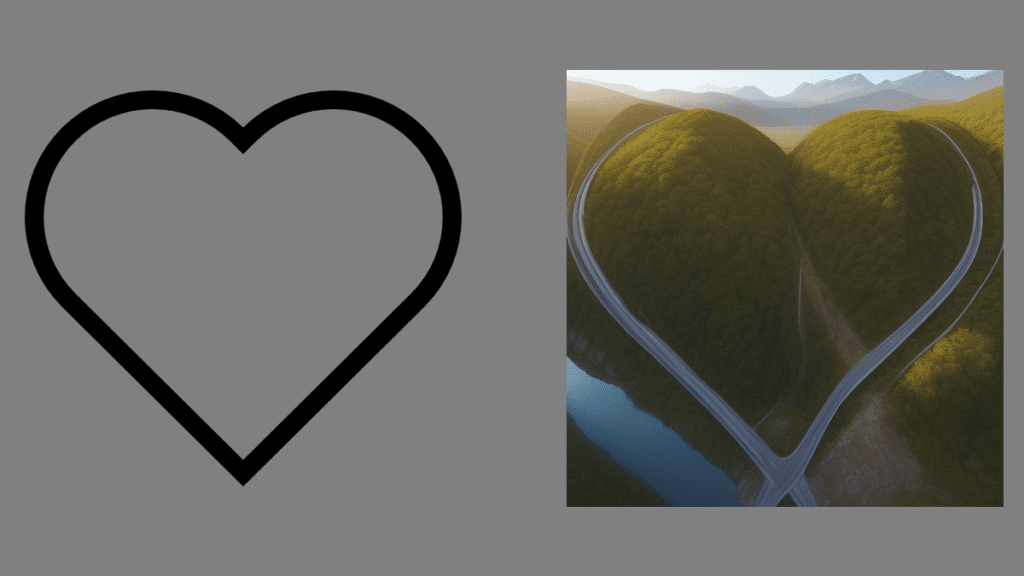
How i created the above image? Well I downloaded the heart png from the internet and uploaded it to the controlnet interface under the txt2img tab. I used following parameters.
a road above river running through mountains, drone view
Steps: 16, Sampler: Euler a, CFG scale: 5, Seed: 3305429259, Size: 512x512, Model hash: 7f16bbcd80, Model: dreamshaper_4BakedVae, ControlNet Enabled: True, ControlNet Module: scribble, ControlNet Model: control_scribble-fp16 [c508311e], ControlNet Weight: 0.5, ControlNet Guidance Start: 0, ControlNet Guidance End: 1
Remember the weight as shown in the controlnet interface image is of importance, you can either increase it or decrease it. The more the weight the more closer it will try to get to the input image. But my preference would be to keep it between 0.3 to 0.7 so that result is bit on the artistic side.


I am linking to the github website the official link to controlnet where all the models results are published, but I will link each result individually so that you don’t have to work hard finding results
- Scribble – Turn your worst drawings into great images using this.
- HED Maps – This model is suitable for recolouring and stylizing
- Hough Line Maps – MLSD model great for detecting lines, could be used to design houses or architectural art.
- Open pose or human pose for Human poses
- Canny is basically good for everything IMO but as I test i will post more results over here with a new article.
Controlnet just got better with Controlnet 1.1
Recently controlnet got update to controlnet 1.1 and new models were released along with it. Older models still work and I will compare some of those models results in this particular section.
Openpose model got the major update and it can now detect face emotions whether its laughing or crying. Go to this link https://huggingface.co/lllyasviel/ControlNet-v1-1/tree/main and download the new models including the .yaml file.

Put them in the controlnet folder as explained above. Remember .yaml and .pth files should have same names.
Comparison between previous controlnet and controlnet 1.1 models
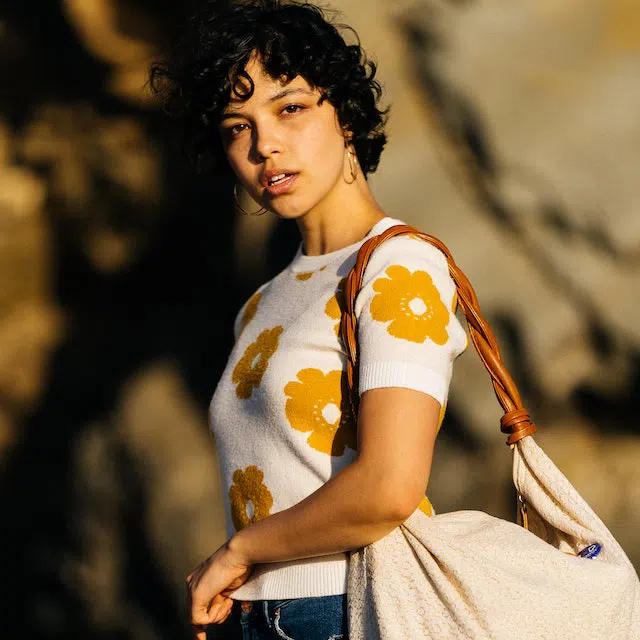
I will be using one reference image for the purpose of demonstration.

Example 1: Old controlnet canny vs new controlnet 1.1 canny model
The reference image above produced some interesting results in my testing


The difference of texture between old and new controlnet canny model is clearly visible. The new canny model produces more defined images. Look at the details on her t-shirt or top, also observe hair are more detailed on new controlnet 1.1 canny model.
Example 2 : Old openpose model vs Controlnet 1.1 openpose model
Reference image will be same like above. Openface got huge upgrade and now you can trace face emotions with more precision and accuracy.


Examples what the above maps generated


Example for face only openpose model


When you use face only preprocessor model it only takes face position and emotion in the consideration and it is independent of other positions in the body as evident in the above example
Using multiple controlnet models at once
Yes you can use multiple controlnet models at one time but sadly i cannot demonstrate you since I have lowvram so I am linking a video by SEcourses which has beautifully explained that how you can use multi controlnet models to get amazing results
I will keep updating this space here as I continue to learn controlnet more and more. So you must have learnt something from this article, If you have kindly bookmark this website as I keep posting AI content over here. So this concludes my article for how to use controlnet with stable diffusion.